
There are times you may need to pay an employee outside of regularly scheduled payroll dates. To process an off-cycle payment, you need to set up a special payroll.
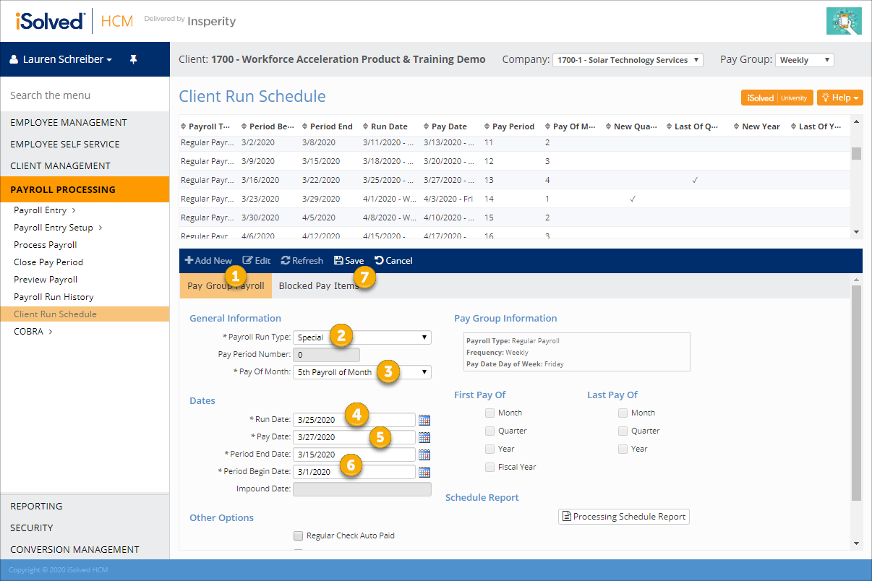
To add an off-cycle payroll, navigate to Payroll Process > Client Run Schedule:
- Click Add New to add an additional payroll schedule.
- Select Special for the Payroll Run Type.
- Select 5th Payroll of Month for Pay of Month.
- Enter the Run Date (the date the payroll will be processed).
- Enter the Pay Date (must be at least 2 business days after the date the payroll is processed).
- Enter the Period End and Begin Date for the payment.
- Click Save.
You will then need to enter time for the employee(s). Since this is a Special payroll type, you will need to enter hours or dollars as additional checks. You can enter time for individual employees using Individual Time Entry, or enter time for multiple employees using the Additional Check Entry Grid.
To enter time for individual employees, navigate to Payroll Processing > Payroll Entry > Individual Time Entry.
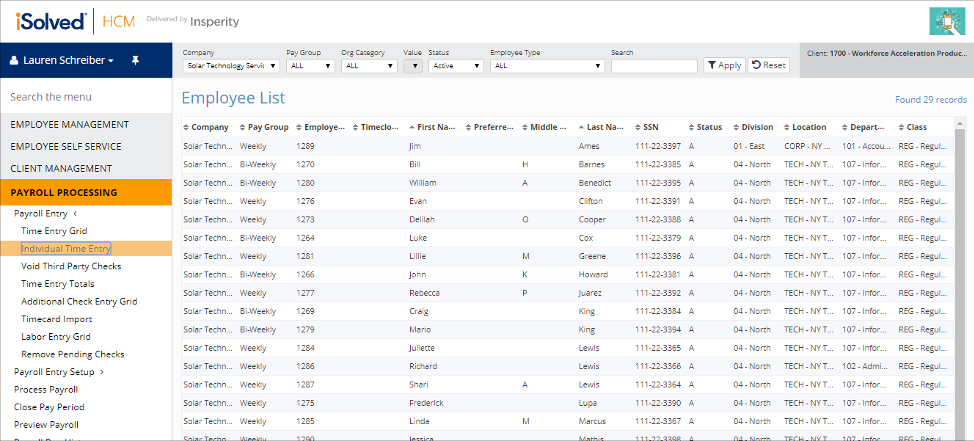
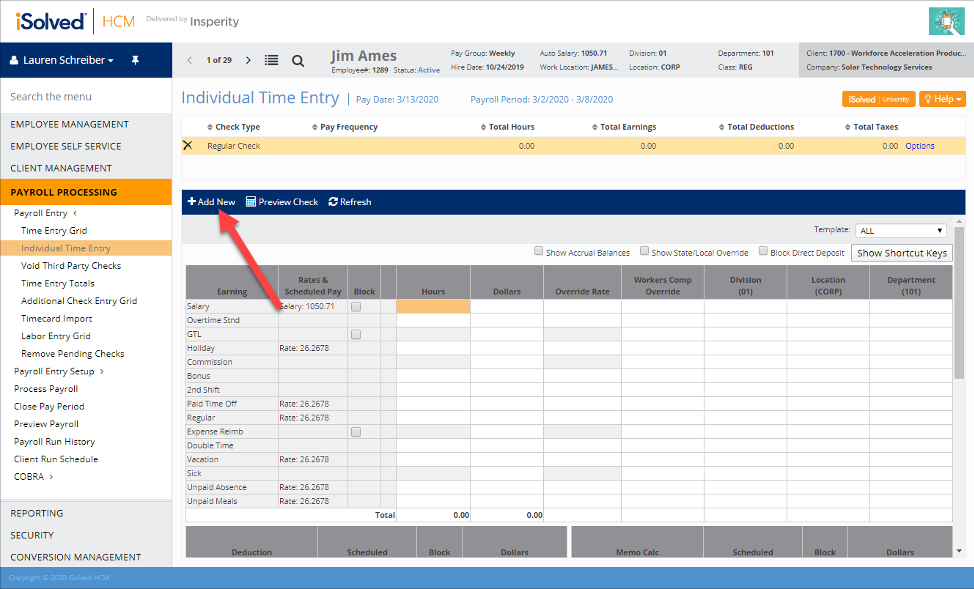
Select the employee who will be receiving the payment. Then, you will add an Additional Check by selecting Add New.
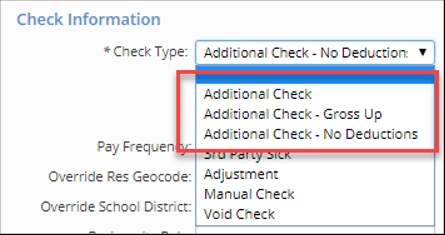
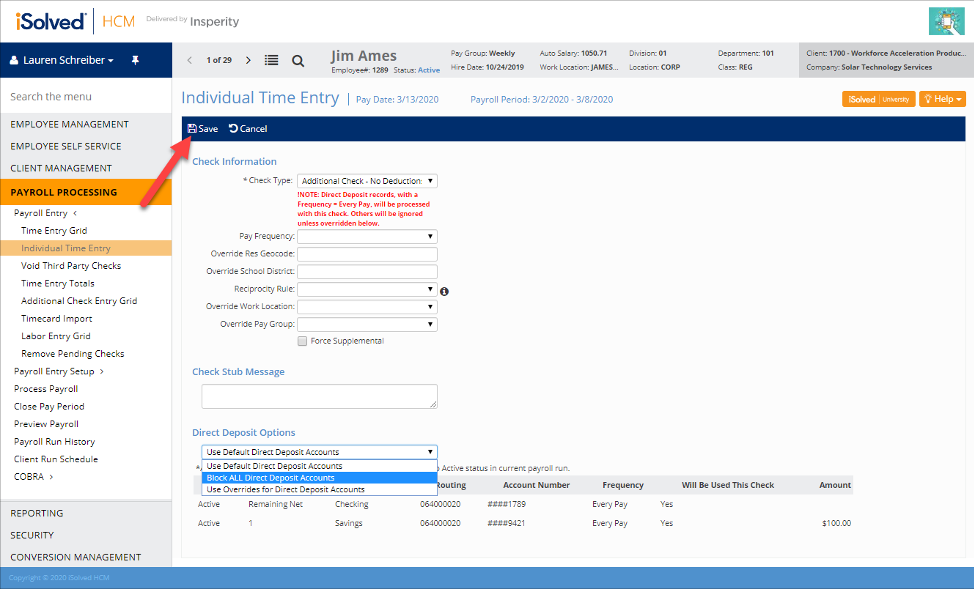
Select from one of the Additional Check options:
- Additional Check: Includes all recurring earnings, memos, and deductions that would be processed in a regular check, and uses regular tax rates.
- Additional Check – Gross Up: Uses the dollar amount you enter and then calculates how much gross pay is required for the employee to receive that amount as their net pay. The employee’s regular deductions and taxes are withheld.
- Additional Check – No Deductions: Will not take recurring deductions from the employee’s payment. Uses regular tax rates.
* If you need a different calculation for your special pay than the Additional Check options listed above, contact your Payroll Specialist. They can define new Additional Check options that pay just specific earnings or memos and withhold just the deductions you need. They can also specify supplemental or specific tax rates.
You will then determine if you need to enter any location overrides, force supplemental tax rates, enter a check stub message, or block or override direct deposit accounts. Once you have made any additional selections needed, click Save.
When returning to the time entry screen, you will now see the Additional Check in the top section. The example below uses the Additional Check – No Deductions option:
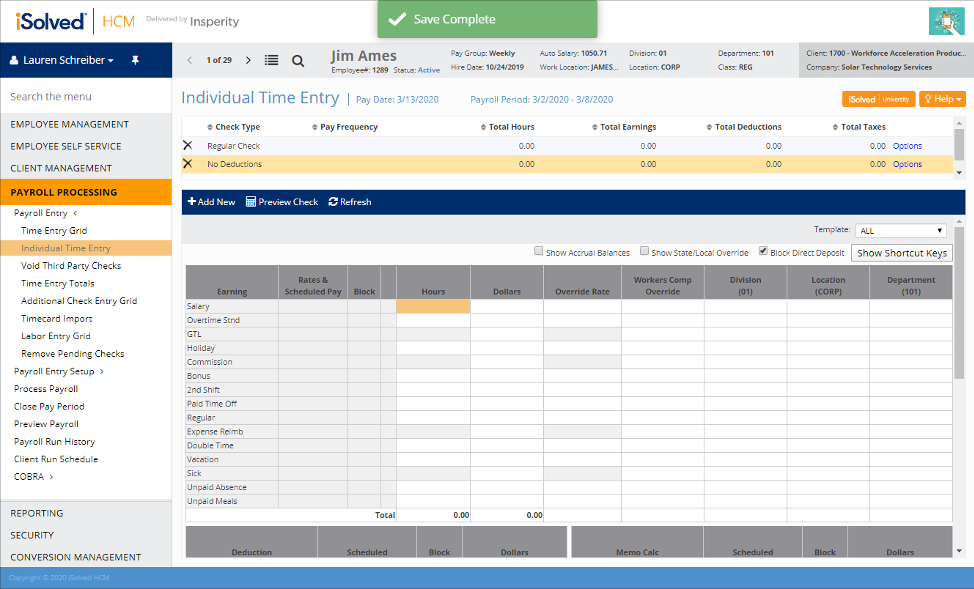
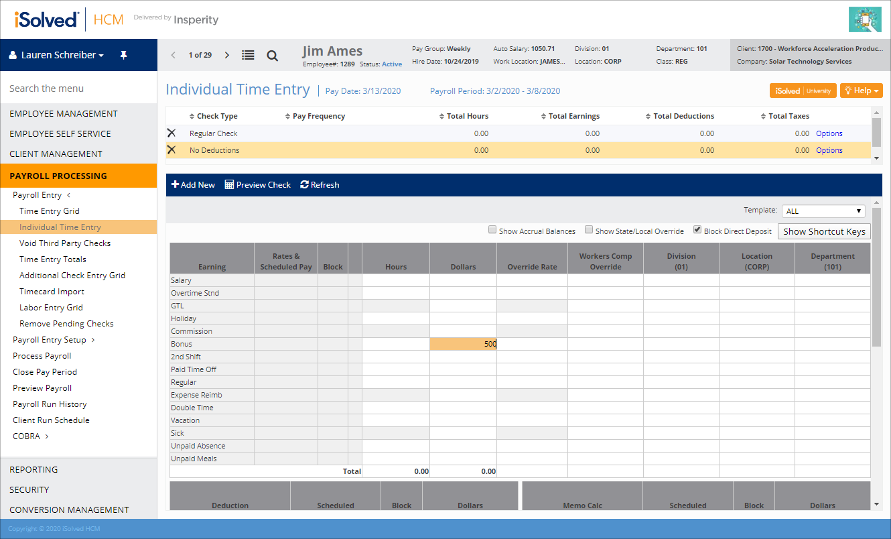
With the Additional Check selected, enter any other hours or dollars that need to be paid to the employee. You can also enter deduction, memo, or tax overrides like you can for regular checks.
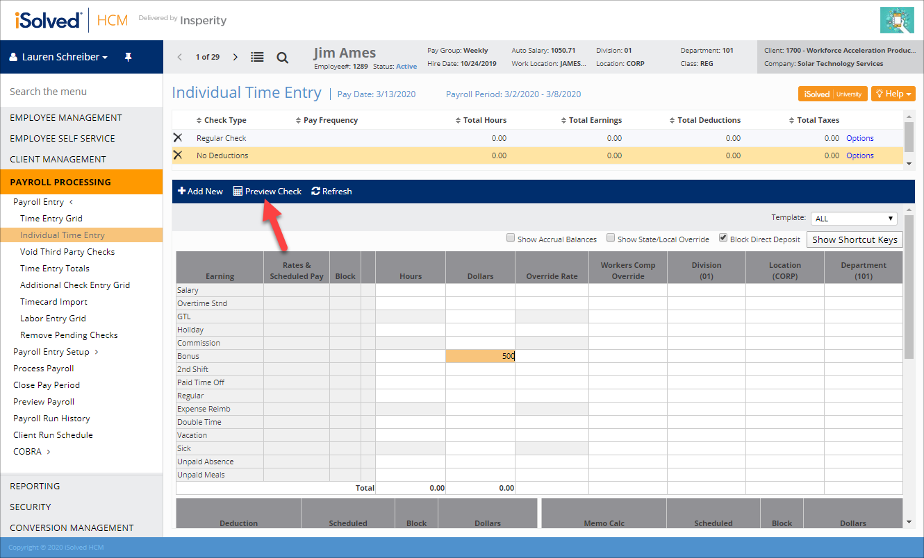
After entering all pay amounts, you can click Preview Check to review the check calculation for accuracy. If you need to make any changes, return to the Individual Time Entry screen and update your entry. Continue to edit and preview the check until you are confident the payment is accurate.
If there are payments that you need to make to additional employees on this special payroll, you can return to the employee list, select the next employee, and follow the same steps to enter an Additional Check. You can also navigate using the forward and back buttons to move through the employees in the employee list.
To enter time for multiple employees, navigate to Payroll Processing > Payroll Entry > Additional Check Entry Grid. The Additional Check Entry Grid allows you to enter Additional Checks for Special payroll runs. The screen functions similarly to the Time Entry Grid for regular payrolls, but allows you to select the Additional Check type to use for the Special payroll.

Choose your time entry template and additional check type and click Apply. You can apply additional filters using the organization category, employment status, or employee type options to further limit the employees who will be displayed in the grid.
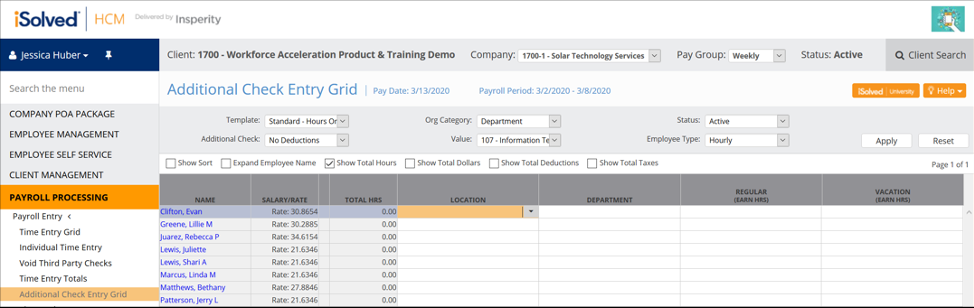
Enter labor fields, hours or dollars that need to be paid to the employees. You can also enter deductions, memos, or tax overrides like you can for regular checks in the Time Entry Grid.
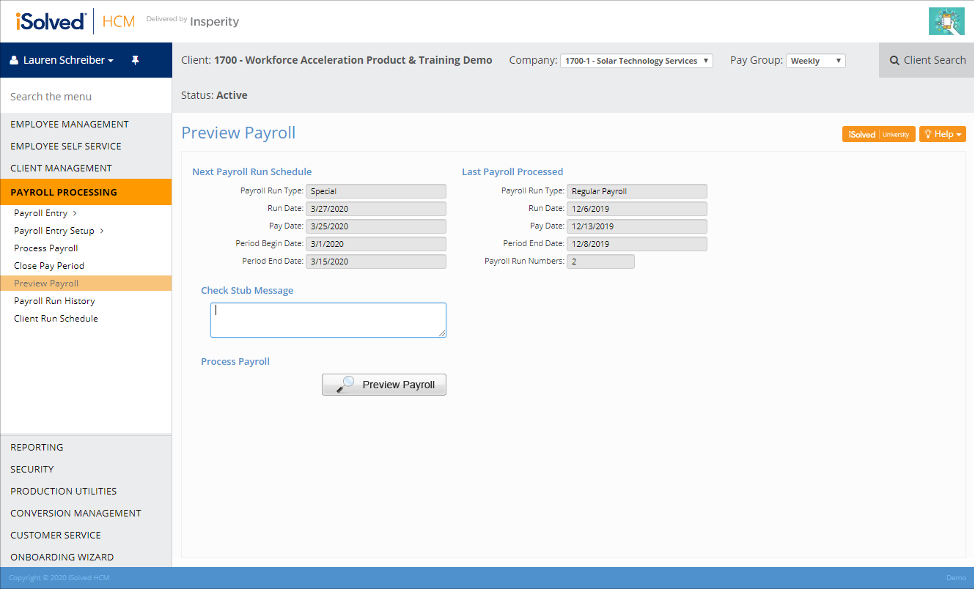
Once you have entered all payments, navigate to Payroll Processing > Preview Payroll to preview the payroll calculation. Always review the dates displayed in the Next Payroll Run Schedule section to ensure you are running your Special payroll calendar. If the dates are correct, click Preview Payroll to calculate the payroll.
Review your payroll reports to ensure that payments are processing as expected. Confirm payment and pay period dates on the reports, as well.
If you need to make any corrections, go back to Individual Time Entry or Additional Check Entry Grid to complete those changes. Then return to Preview Payroll to re-calculate the payroll. Continue to do this until you are confident that your special payroll is correct and ready to process.
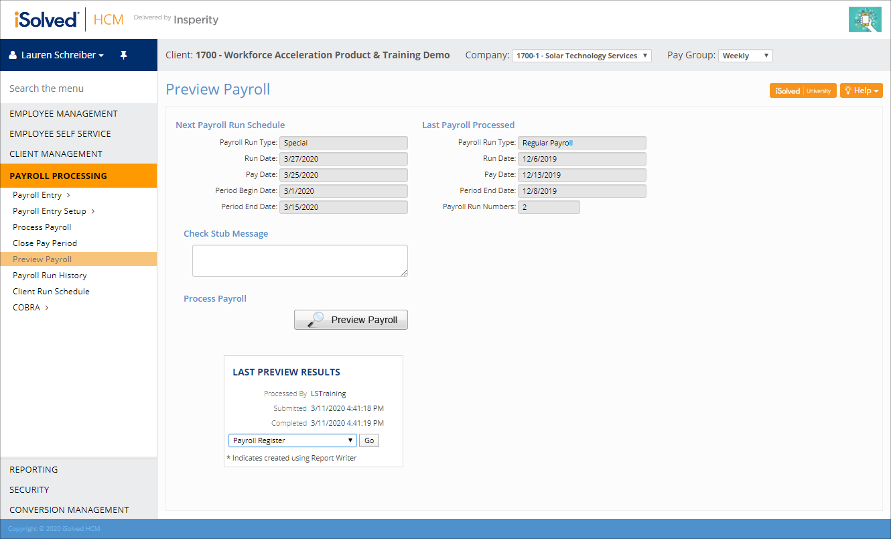
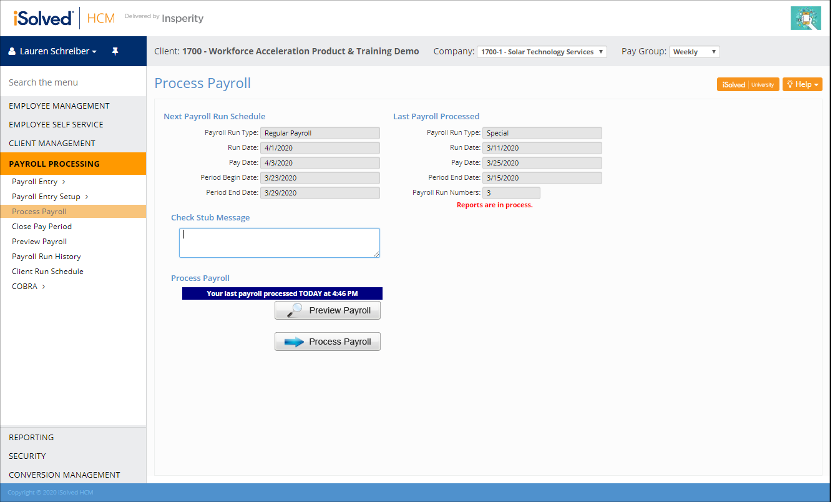
To finalize payroll, navigate to Payroll Processing > Process Payroll. Again confirm that the dates display in the Next Payroll Run Schedule section are accurate, and that you have completed a preview calculation after your last changes (last preview time is displayed in the Last Preview Results box in EST).
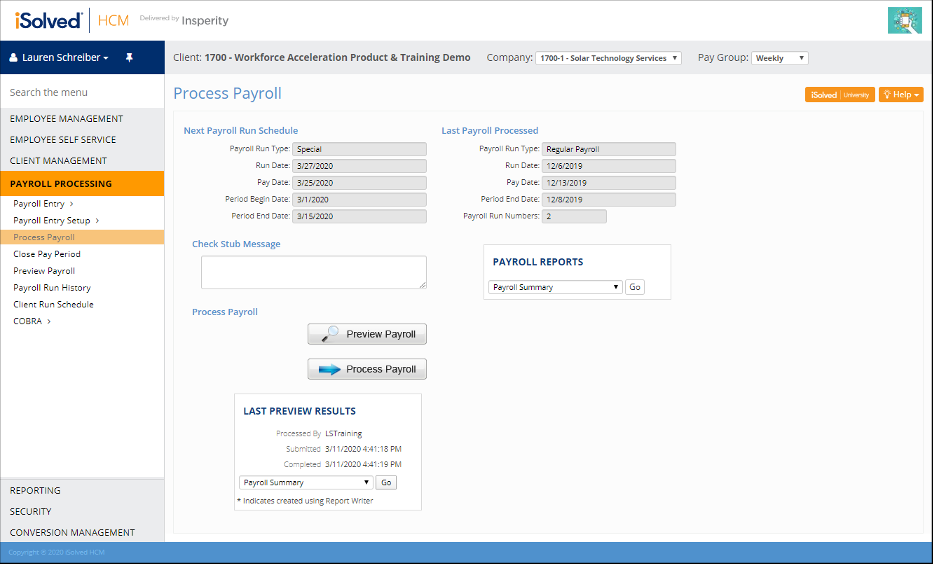
You can then click the Process Payroll button to finalize the payroll.
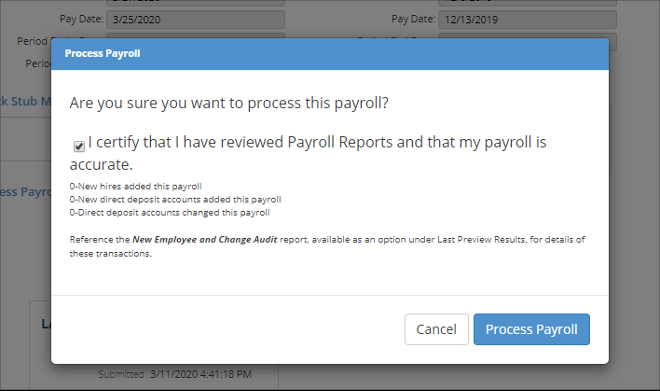
Once the payroll process has completed, you will see a dark blue box displayed on the screen. You can also confirm that the Special payroll details are now displayed in the Last Payroll Processed section.
For additional payroll processing guidance, you can review the Payroll Processing User’s Guide in the iSolved University here.
Your Insperity payroll specialist is here to help. If you need any assistance setting up an off-cycle payroll calendar, entering payments to employees, or processing the payroll calendar, please reach out to your payroll specialist for assistance.